Photobucket Photobucket Photobucket

Friday, May 8, 2015

Postal Museum

I was visiting my daughter this week in Southern Ca. and finally got to
 pay a visit to the Redlands Postal Museum.

The Museum is tucked away in the historic Main Post Office at 201 Brookside Avenue in
Redlands, CA. This lovely building is on the National Register of Historic Places. Several
years ago it was in danger of being sold.

This is the grand interior of the old post office with the vaulted ceiling and
wood beamed ceiling. I am so relieved they saved the post office.
Look at the beautiful arches with the ornamental ironwork where the P.O. boxes are housed.


This case in the post office lobby has a display of letters and post cards
 mailed long ago.

This is the first photo taken in the Redlands Postal Museum. They saved
the old window from a post office and put it on display. The next series of
photographs are some of the items displayed in the museum.


There was a wall of old mail bags on display.

And of course you have to have letter carriers hats on display too.


Mr. Zip sticker on a mail bag!


This sweet little museum was a nice side trip for us to enjoy. The
Redlands Postal Museum is open during the same hours as the post
office so it is closed during the weekends.  All you postal
lovers out there go visit this tiny museum if you find yourself in
Redlands, CA. in Southern Ca.

Sunday, April 26, 2015

Envelope Booklet Tutorial

Here is a booklet tutorial that I showed Pamela from Cappuccino and art Journal and the other friends who gathered at my studio  a few weeks ago.  I used a page from an old atlas from the the library book sale that I went to with Pamela and Leslie.

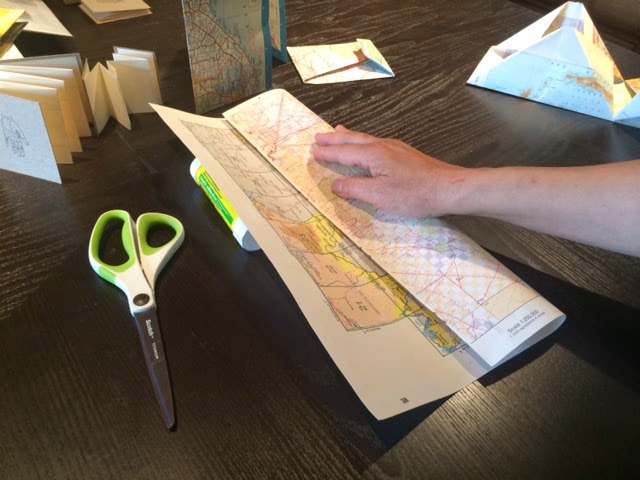
Put the image that you want on the outside of the booklet face down on the table. Next fold the paper into thirds. You can measure if you like  or eyeball it like I do. 

Make a nice crisp fold using a bone folder. If you don't have a bone folder use a credit card to help crease crisp.

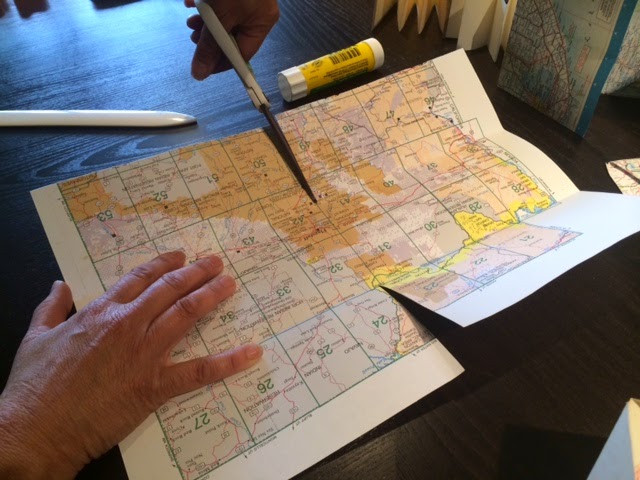
Open the paper and fold in half and crease your fold.

Take your pair of scissors and and cut from each side of the paper to the first fold.

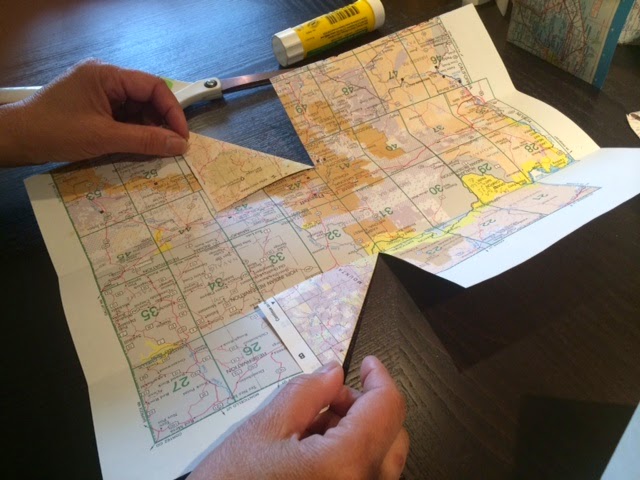
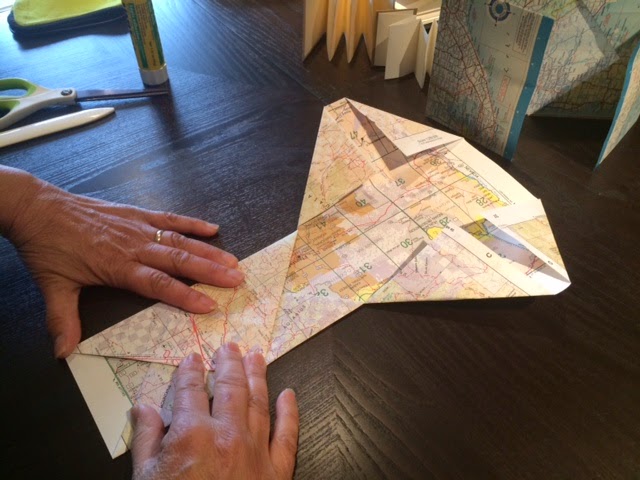
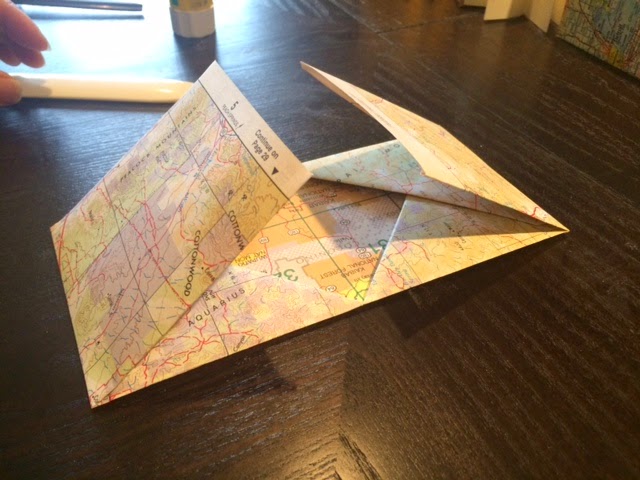
You will now fold the corners in to the first fold making a triangle. 

Repeat the folds to all corners of the paper. 


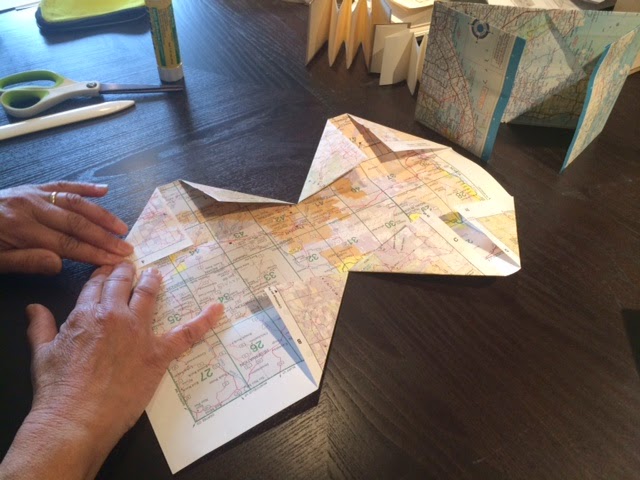
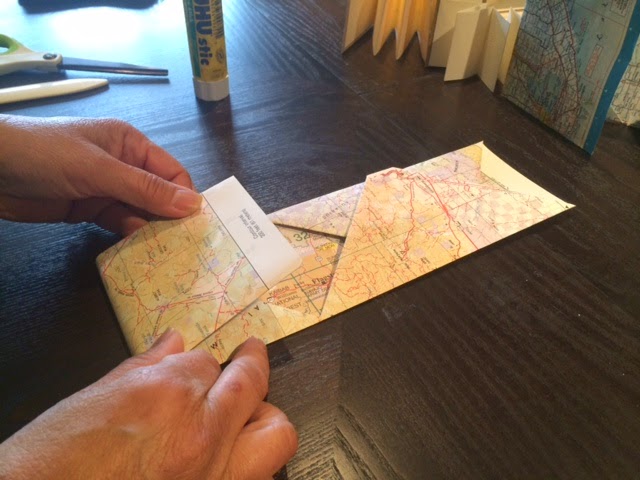
Fold in the sides of the paper on the fold line.


Fold each end to the center fold.


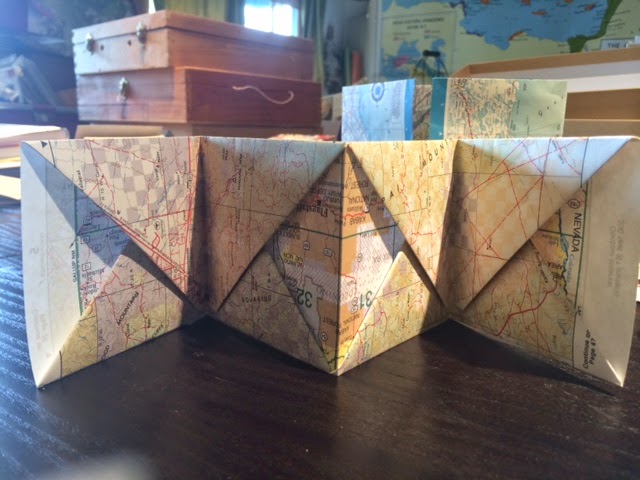
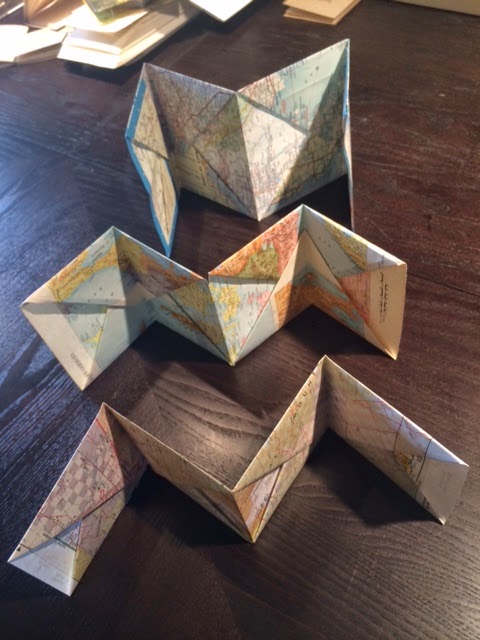
Here is your finished envelope booklet!  

Here are three more envelope booklets made from different atlases We made
these at the party I hosted in my newly cleaned studio.  I hope to add some more 

envelope tutorials soon. I have a lot I want to share using repurposed materials of course!
                A shout out to my friend Pamela from Cappuccino and art journal for taking the
                photographs for this tutorial and for all her technical help as well. Her help
               and encouragement will get me posting on a more regular basis!

Tuesday, April 21, 2015

Altered Book Show

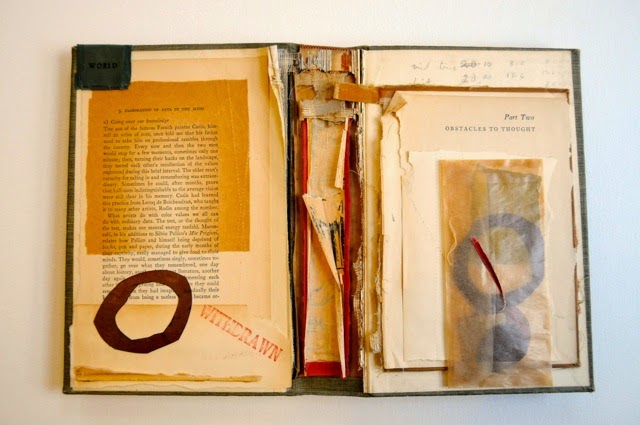
This is my Altered book I entered in the MarinMOCA Altered Book and Books Arts show in
Novato, CA.

This is a detail of the spine of a discarded library book.

I used a glassine envelope and added some other elements into the piece including
a tag and a  torn book page.


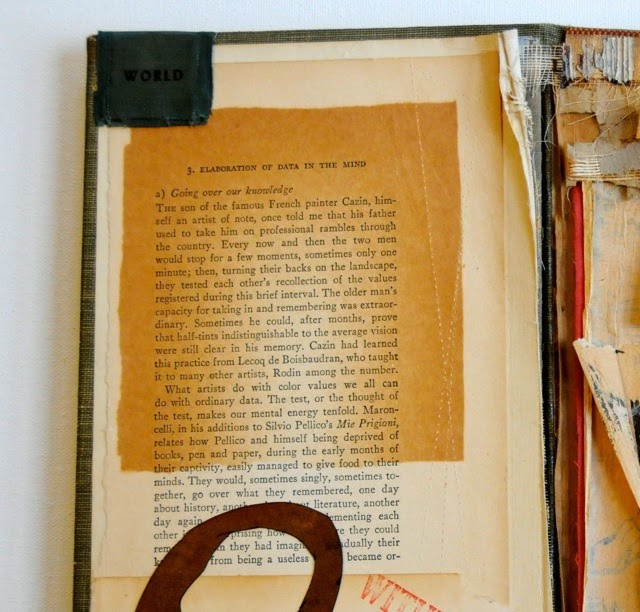
The little holes on the right hand side of the book page was made by putting the pages in my perforator that I normally use to make artist stamps. I wanted the texture to mimic a sewing machine.
I found a book page and it was discolored from having a old
newspaper clipping inside of it. It left a stain on the page. I
really loved the color it made on the page.  


The Altered book show is going on right now until May 23rd. It has over 150 
pieces in the show from artists all over the Bay Area. Go check it out and let me 
know what you think of the show. This is my third time being a part of this exhibition.


Friday, December 26, 2014

Tiny eco gift wrap


             I had some tiny packages to wrap so I got out the security envelopes 
             and some of my stash of old papers to wrap the tiny boxes.


These tiny packages were wrapped in an old map, ledger sheet, discarded book pages, and my grocery receipt!

I had the most fun wrapping with envelopes scavenged from our recycling bin. Just
turn the envelope inside out and cut to size and wrap.


This package is made from two former coffee bags. I cut the bag down and made a top and a lid. The
"ribbon" is a discarded paperback book. I cut the book into quarters and then folded the pages in half.


        I wrapped these packages for the holiday gifts but this wrapping would work for 
        year round gift giving. 


Thursday, December 25, 2014

Security Envelope Winter cards


 I wanted to make something out of these old security envelopes this week.

Look through your recycling bin for the envelopes that your bills came in. Next month we all should have quite a few after the holiday shopping.
                                      

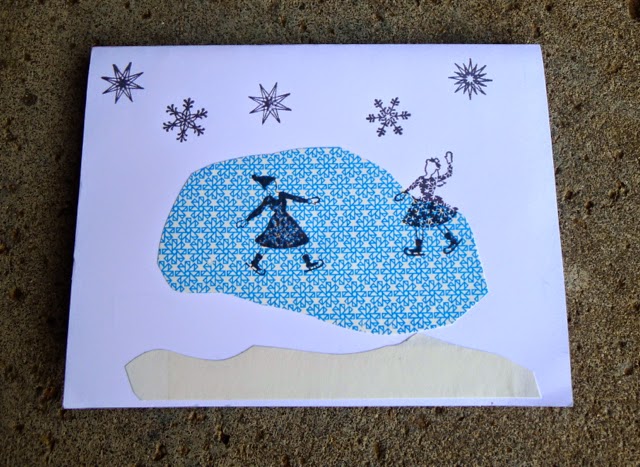
I searched for the blue liners. I cut up the envelope in the shapes of "ponds" and glued them to card stock.


I got out my Martha Stewart stamp set I picked up at 70% off last year to decorate the card.


I stamped the ice skater on the "ice pond" made from the inside of the envelope.


Here is one of the cards I made. I may send it out as a thank you note or a New Years card. It is a lot of fun to repurposed these envelopes. I will post more later on my another use for these envelopes.


Friday, October 17, 2014

Gelatin Monoprint

I have joined the many artists who love printing on a homemade gelatin plate or a commercial Gelli plate I purchased at Blick's.  Here is a print that I did with a small plate. I made four sections. I ended up making only one so I color copied it and made cards out of the print. I used string, a plastic alphabet stencil, a paper tube and bubble wrap for texture.


Monday, July 21, 2014

Reclaimed Room Make and Take!

My artist friends Megumi Inouye and Dorothy Yuki www.dotsrainbow.com along with myself
participated in a Make and Take event at this weekends SCRAP Party. We lead three workshops.
It was held in The Reclaimed Room at Building Resources. www.buildingresources.org. where
SCRAP Art - Creative Reuse in the Bayview art show is happening!

Jennifer Morningstar- curator, Monica Lee, Dorothy Yuki, Megumi Inouye
Make and Take workshop artists and Shuai Chen-Exeuctive Director of SCRAP.
(photo by Gloria Soliz)


My workshop was called creative reuse jewelry. All the necklaces were made with
paint chip and remnants of felt and cording.


Dorothy Yuki's workshop was Origami Butterflies. These  butterflies were made
out of National Geographic magazines.


Megumi's origami bows made out of music sheets, ledgers, old maps and more!